This feature is now deprecated and not available for new customers.
Setting up Pin Payments for Hiveage will only take a few minutes, but requires you to login to both your Pin Payments and Hiveage accounts.
In your Pin Payments account:
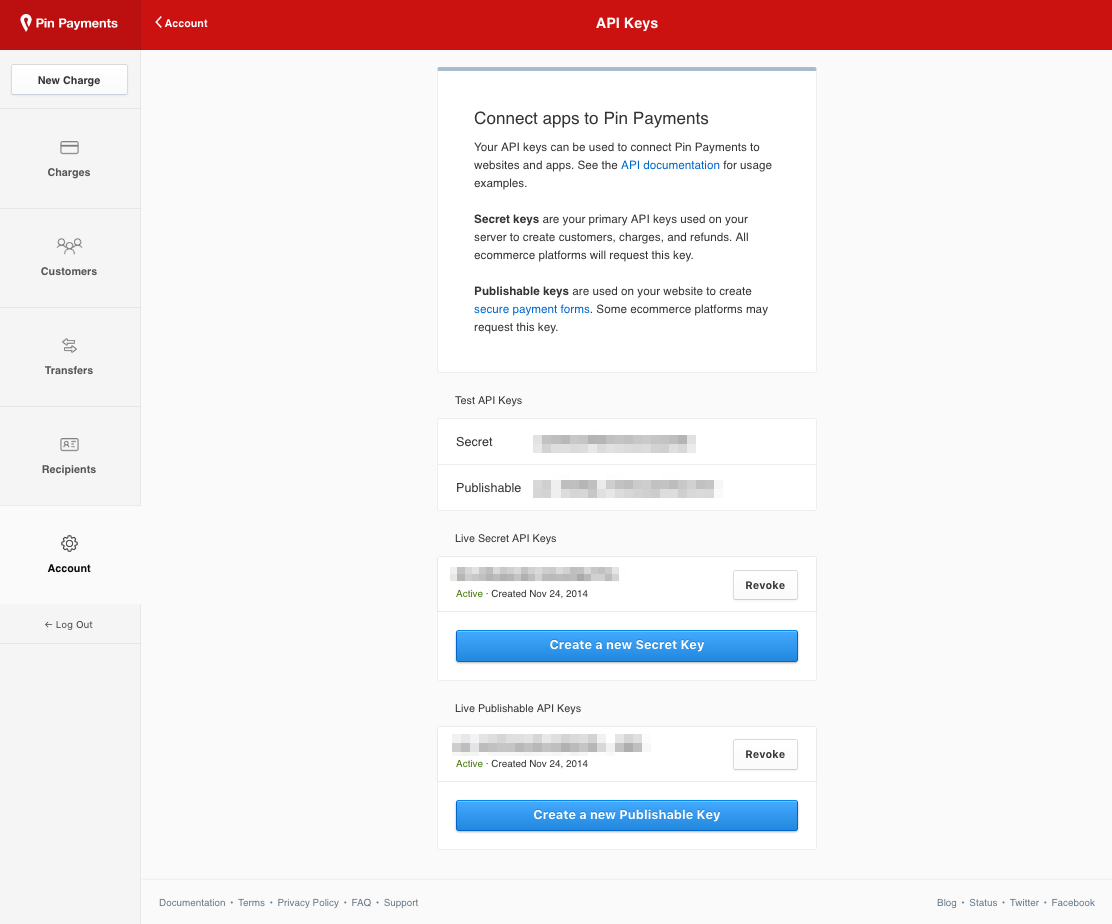
- Click Account to access your Account Dashboard
- Click the Show Key link next to Secret API Key: to see your API key.
- Write down your API key or copy it to the clipboard.
In your Hiveage account:
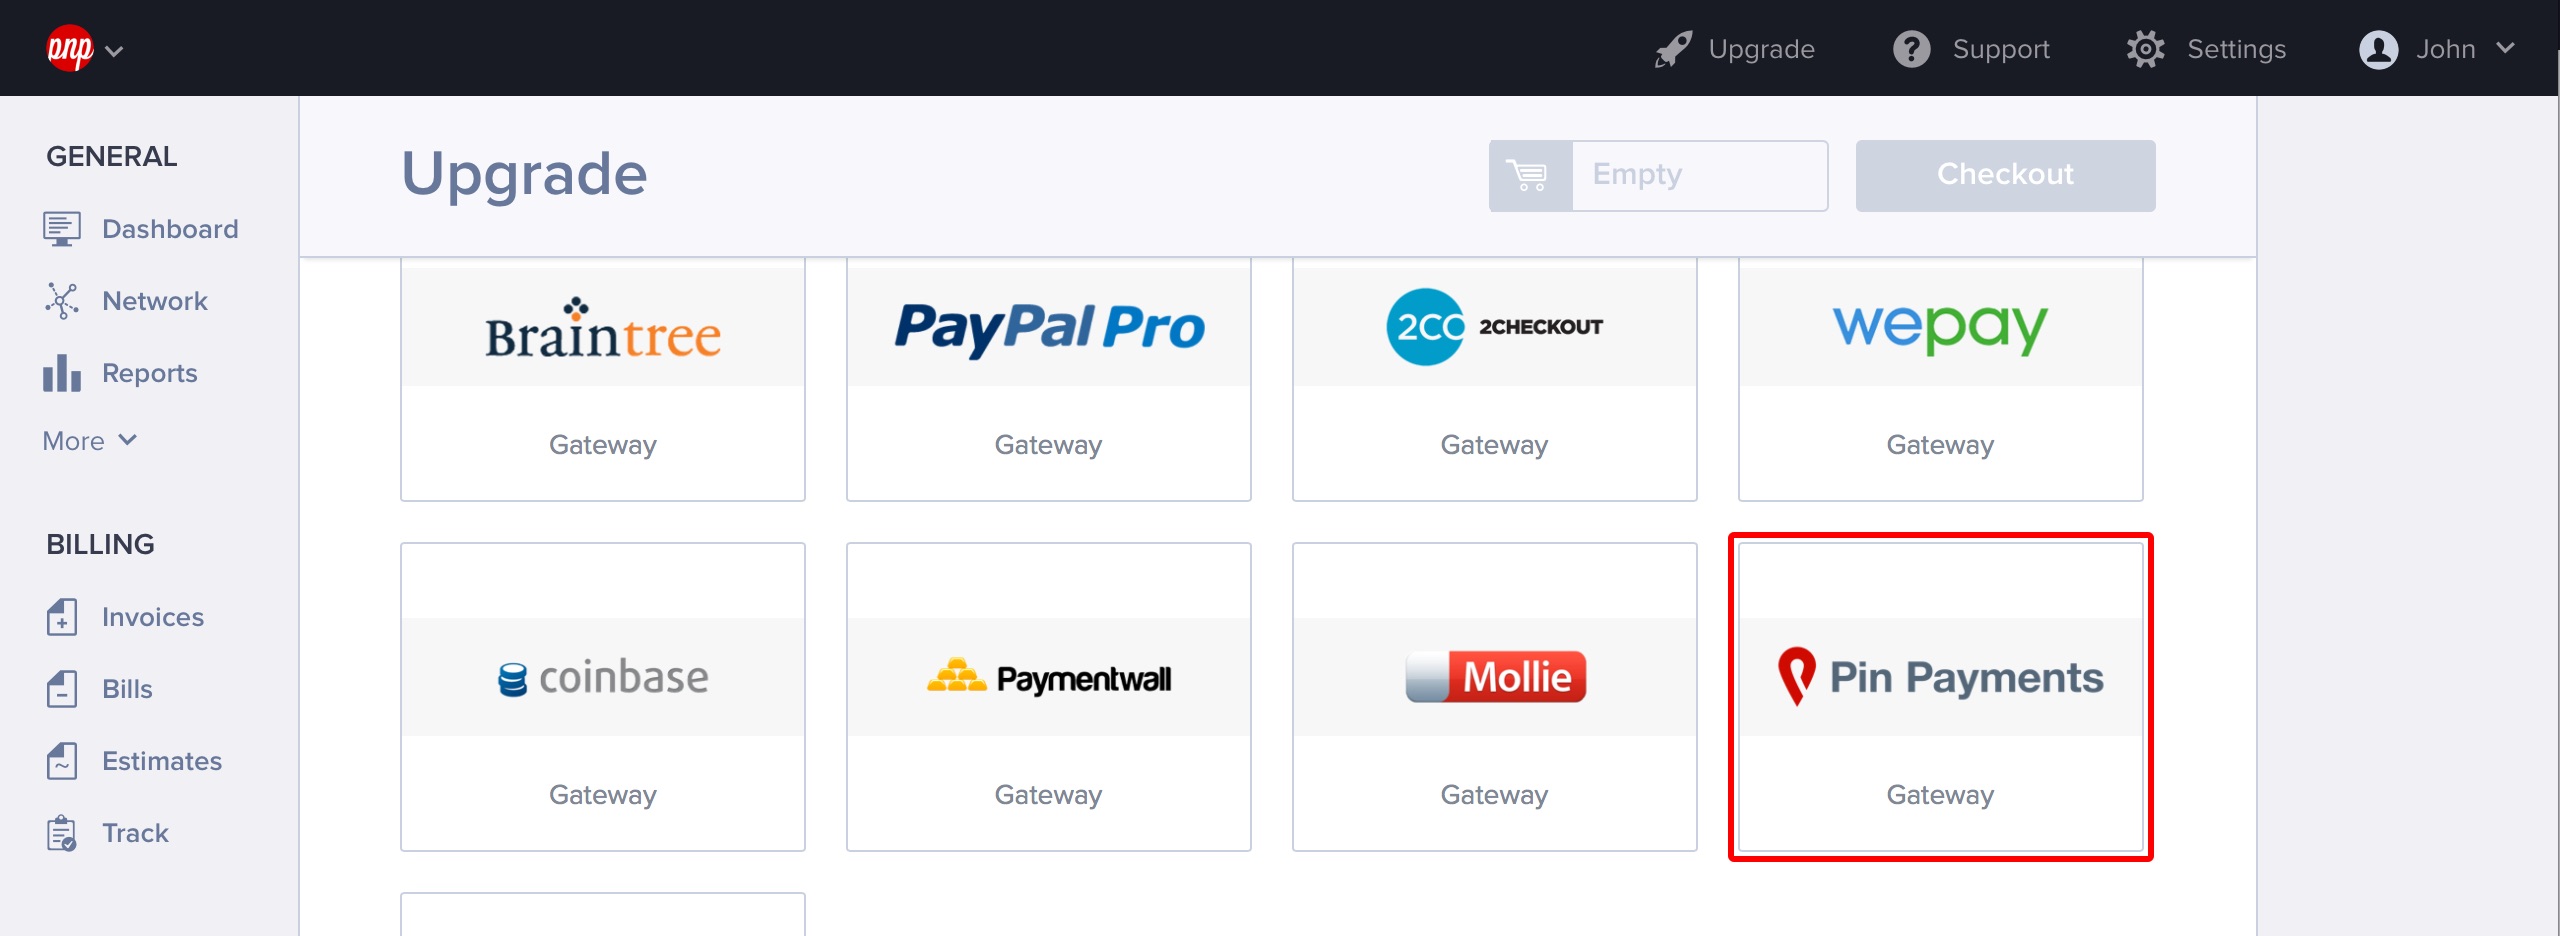
- Go to the Upgrade page.
- Click the Pin Payments module.
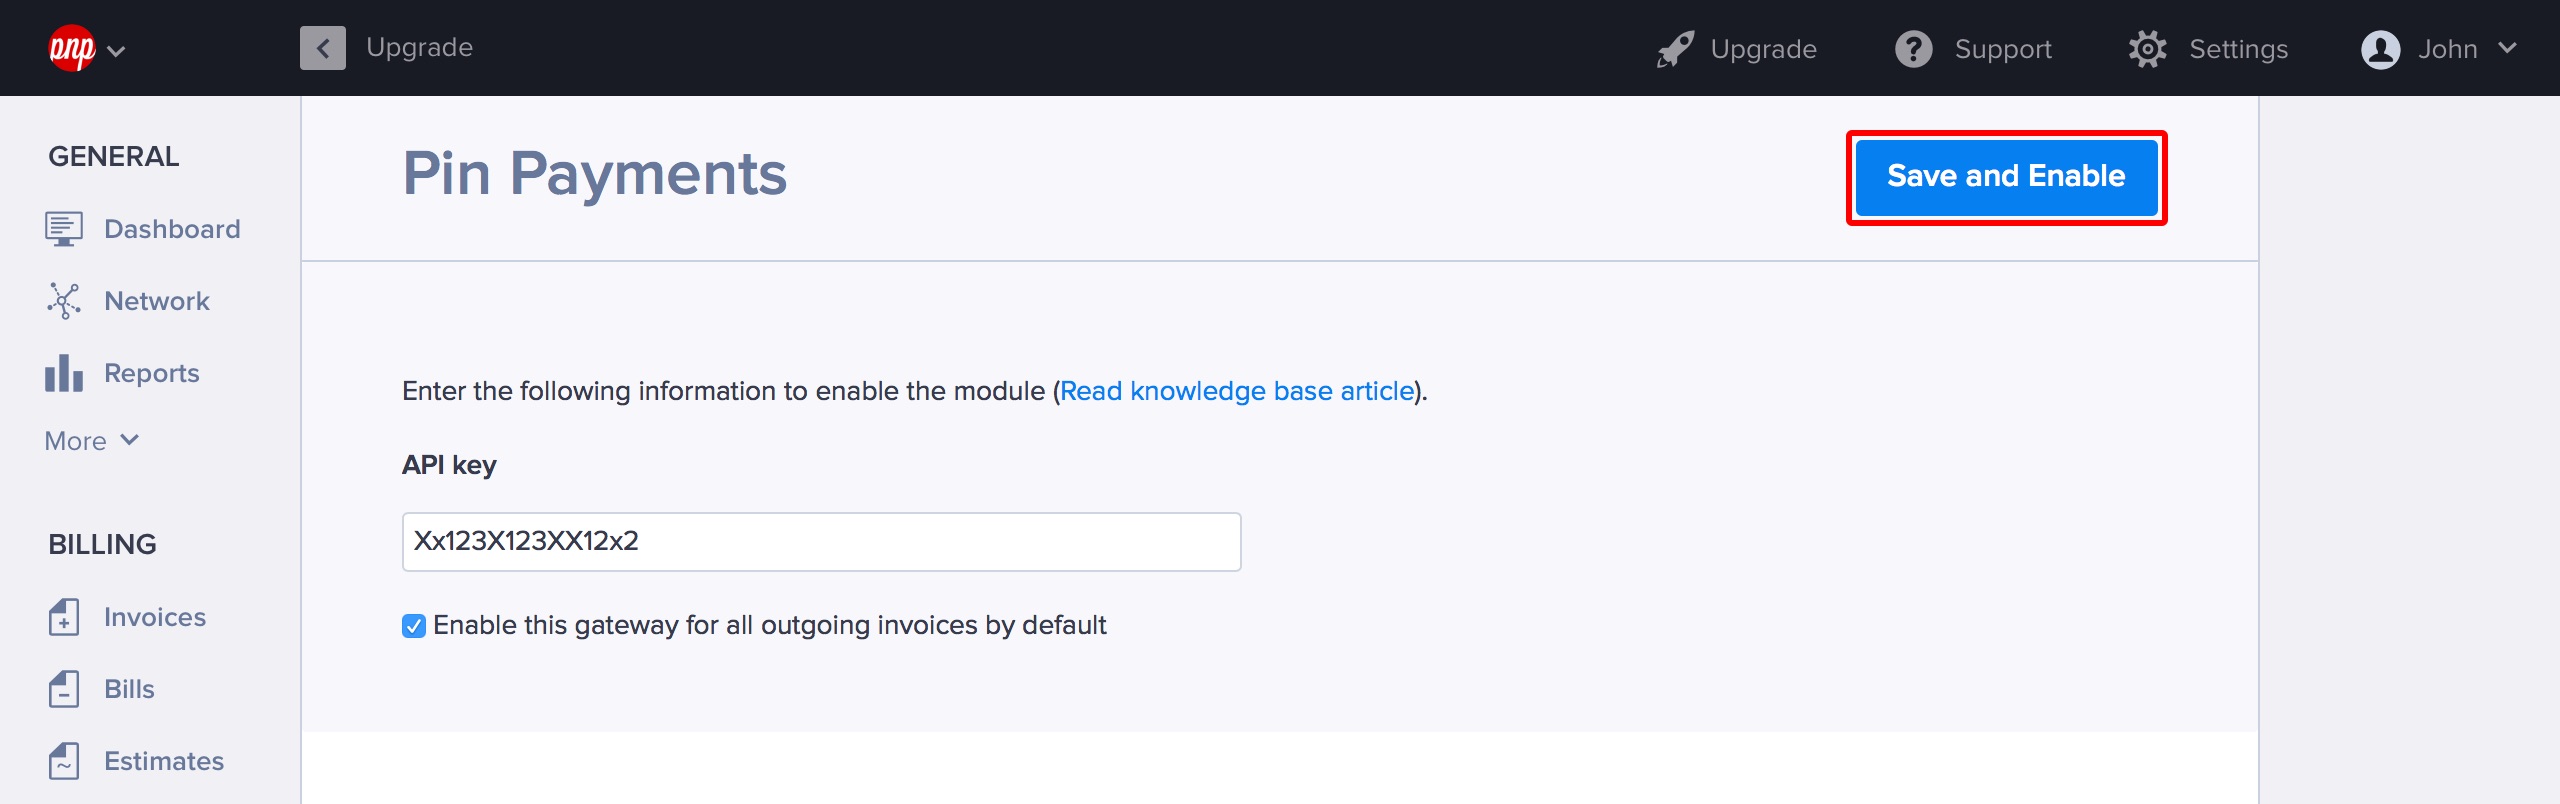
- Enter your API Key.
- If you would like this to be your default payment gateway, tick Enable this gateway for all outgoing non-recurring invoices by default.
- Click Save and Enable.
If you enable Pin Payments by default, it will appear as a payment method on all invoices you send from Hiveage. Alternatively, you can leave it unchecked, and enable Pin Payments for individual invoices from each invoice’s Invoice Settings section.